Electrical tasks, both minor and significant, require a dependable and versatile tool to ensure safety and accuracy. One such tool is the multimeter. This guide aims to provide a comprehensive understanding of multimeters, their components, and how to effectively use them in various applications.
Introduction to Multimeters
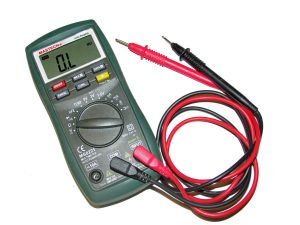
A multimeter, often referred to as a multi-tester or volt-ohm meter, is a versatile electrical instrument used to measure multiple electrical properties, including voltage, resistance, and current. Multimeters are available in both analog and digital versions, each with its own advantages and disadvantages.
Multimeters are essential for gauging the functionality of wall plugs, testing batteries and power supplies, and verifying the working condition of various electronic devices. They empower users to measure the following electrical properties:
- AC Voltage: Tested in items with electrical plugs.
- DC Voltage: Used for batteries or items that store electrical power.
- Resistance: Measured in ohms.
- Current: Measured in amperes, often referred to as amps.
Note: When using a multimeter, always begin with a high range and gradually reduce it. A range that’s too low can lead to inaccurate results and potentially harm the device.
Components of a Multimeter
Understanding the various parts of a multimeter is crucial for accurate measurements. While the labeling and options may vary from one model to another, the core components remain the same.
Switches and Display
- On/Off Switch: Some multimeters are equipped with an on/off button or switch. Others feature an auto-off function to conserve battery life.
- Display: This could be digital or analog. A digital display provides a numerical measurement, while an analog display shows the measurement on a meter with a moving pointer.
Selector Knob and Labels
- Selector Knob or Button: This is used to select the unit of measurement. The options on the knob correlate with the choices on the display.
- Labels: On the selector knob, you’ll find symbols representing voltage (V), current (A, for amps), and resistance (Ω, the Greek letter omega symbolizing ohms).
Jacks or Ports
Multimeters typically have three or four ports that resemble headphone or auxiliary jacks. These ports include:
- Common Port: The black, grounding or neutral port, found in all multimeters.
- V Omega m-A: The red port used for most measurements, including volts, resistance, and small-amp currents.
- 10-A: Another red port, used less frequently for handling large currents up to 10 amps.
- 300mA: This red port measures currents up to 300 milliamps.
Probes
Multimeters come with two probes, or leads. The black probe, which is neutral and doesn’t carry electricity, always plugs into the common port. The red probe, which tests voltage, resistance, or frequency, plugs into the port matching the property you’re testing.
Testing Your Probes (Leads)
Before using your multimeter, it’s vital to check the condition of your probes.
Safety Note: Always ensure that your testing area is dry and your equipment is in good shape. If your equipment appears damaged, do not proceed with testing.
To test your probes, follow these steps:
- Set your multimeter to the ohm meter on the selector knob.
- Plug the black probe into the common port and insert the red probe into the jack marked for ohms.
- Gently tap the red and black tips together, avoiding direct contact with the metal parts.
- Your reading should be 0.5 ohms or less. If your reading is higher, replace the probes.
Measuring AC Voltage
One of the most common uses of a multimeter is measuring AC voltage. Here’s how to do it:
- Turn off all power to the plug you’re testing.
- Set the mode on your multimeter to AC voltage, ensuring it’s set higher than the voltage number printed on the cord.
- Connect the probes to the multimeter and the plug, then check your reading.
- When finished, remove the probes in the reverse order they were connected.
Safety Tip: If you need to test an AC main, use a multimeter rated Category II or higher. But it’s generally advisable to leave this job to a professional.
Measuring DC Voltage
You can also use a multimeter to check DC voltage, such as the charge on a battery.
- Disconnect the battery from any power sources or chargers.
- Set your multimeter to measure DC voltage.
- Insert the probes into the appropriate jacks, then touch the black and red probes to the negative and positive sides of the battery, respectively.
- Record your reading, then disconnect the probes.
Measuring Resistance
Measuring resistance is particularly useful for those repairing electrical components. Here’s how to do it:
- Disconnect the component you’re testing from all live circuitry.
- Set your multimeter to the ohm meter function.
- Insert the probes into the appropriate jacks, then touch the probes to either side of the component you’re testing.
- Adjust the ohm range on your multimeter as necessary to get a readable measurement.
Choosing the Right Multimeter
Choosing the right multimeter depends on your specific needs. Both digital and analog multimeters measure DC voltage, AC voltage, and resistance, but they have different strengths and weaknesses.
- Digital multimeters are ideal for heavy, day-to-day users and homeowners who want clear and accurate readings. They offer easy-to-read displays, auto-ranging options, and specific functions for specialized work.
- Analog multimeters are more affordable and suited for occasional use. They are known for their cost-effectiveness and adeptness at measuring amps, especially milliamps.
Understanding the intricacies of multimeters can help you make the most of this versatile tool, whether you’re troubleshooting an old lamp or testing a wall plug. Always remember to use multimeters safely and responsibly. If you’d like to work with a multimeter daily, consider taking our HVAC/R program. We offer hands-on courses over the course of 30 weeks to prepare you for a rewarding career. Talk to an admissions rep today.